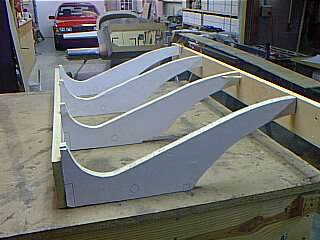
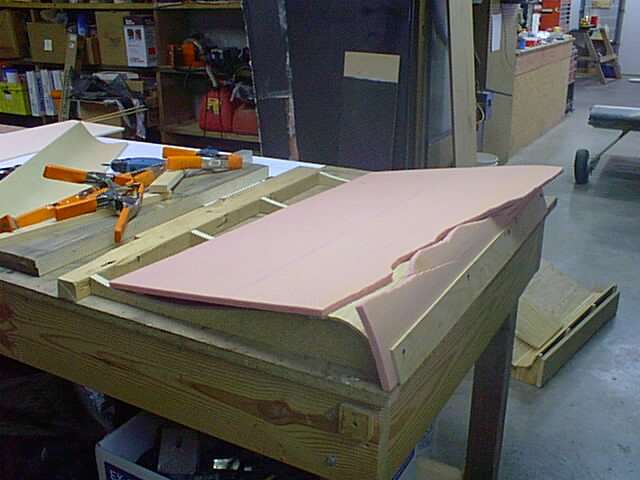
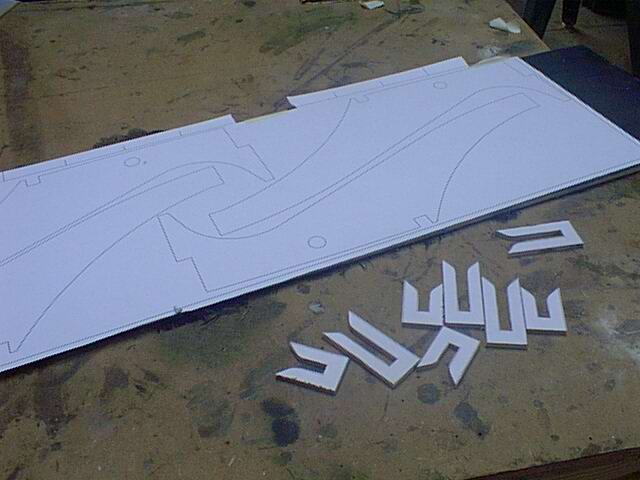
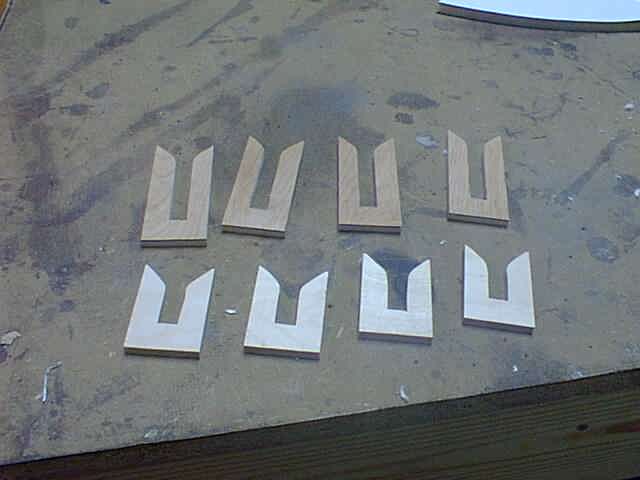
Next step was to duplicate the curves in a CAD model of the front and rear spar area, yielding a set of full size templates, which I glued to 3/4" particle board and cut to size. The two 1x's represent the front and aft spar.
revised January 21, 2000
Although Jeanie sewed up a sling seat for me from some fabric store canvas, I never really felt like I could actually sit on it without falling through the floor. I'm sure that if I'd used Herculon or some other suitable fabric, my sling seat would have been more confidence inspiring, but after sitting in Mark Jones' KR with a plywood seat bottom, I could never go back to the sling. So I killed a month building a composite seat of foam and carbon fiber.
First step was to sit in a comfortable lawn chair and make a picture of my butt from the side, to get a clue as to what a comfortable sitting position looked like. I'll spare you that picture.
Next step was to duplicate the curves in a CAD model of the front and rear spar area, yielding a set of full size templates, which I glued to 3/4" particle board and cut to size. The two 1x's represent the front and aft spar.
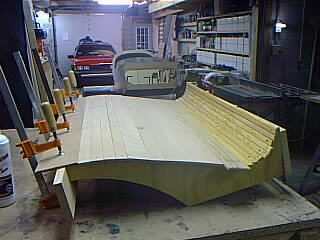
Next I "floored" the jig with some 1/4"x3/4" pine strips that were left over from one of my aft desk fiascos, by nailing and polyurethane gluing them in place.
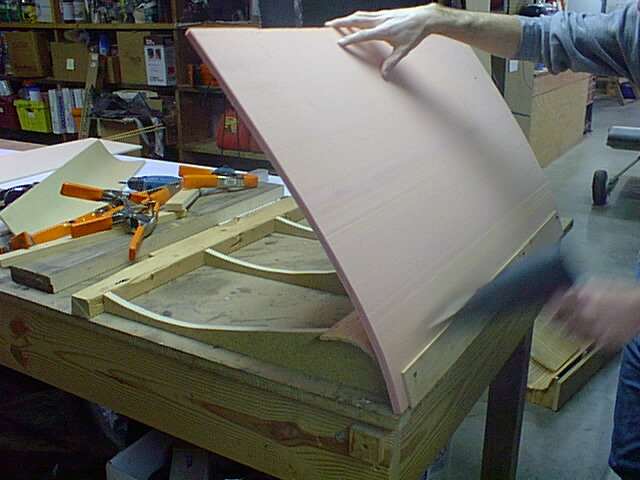
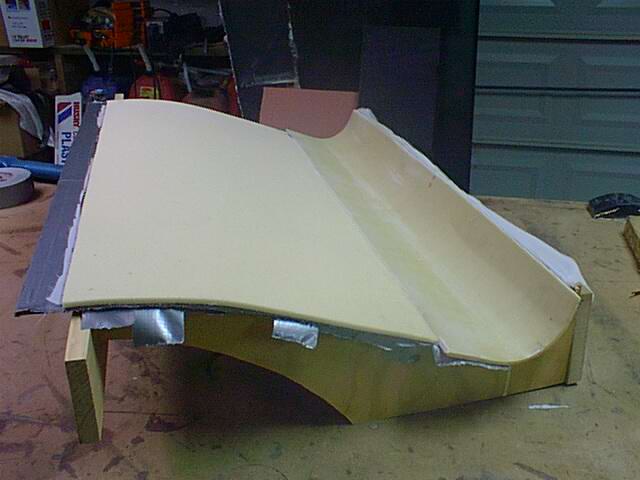
I then proceded to heat up some Lastofoam that already had a layer of glass on one side (left over from the wing tanks) and over the period of about an hour persuaded the stuff to conform to the shape of a "reciprocal" oppositely shaped jig. Have you ever tried to heat up such a good insulator? It ain't easy, and I'm lucky I didn't break it.
I finally got it bent all the way around the jig, so I heated it some more to permanently deform it, and let it sit for a few days. Bending this curved piece is really all I used this form for.
Then I started getting a little too perfectionist and decided I wanted it all to be one piece, and maybe it would bend easier without the layer of glass on one side (against my better judgement).
NOT the way to do it!
So I wisely decided to be happy with the piece that I'd already made and prepared to make the seat by covering the form with duct tape.
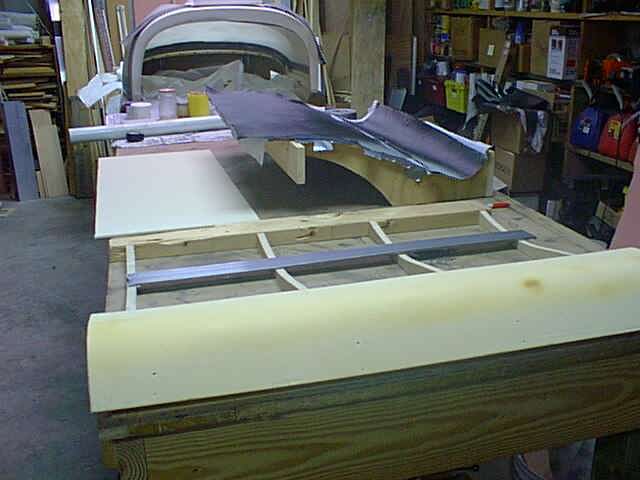
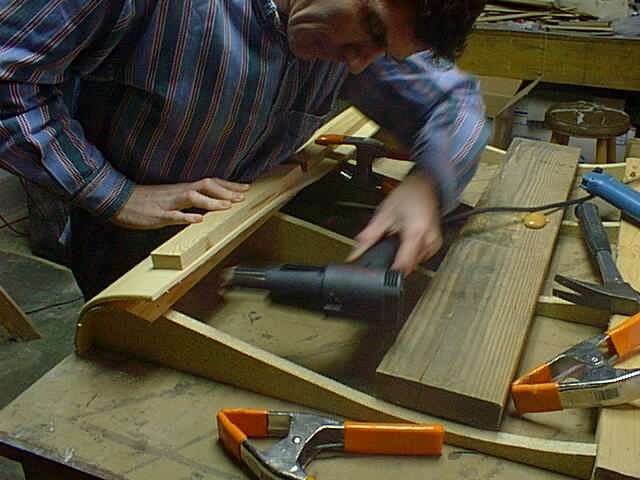
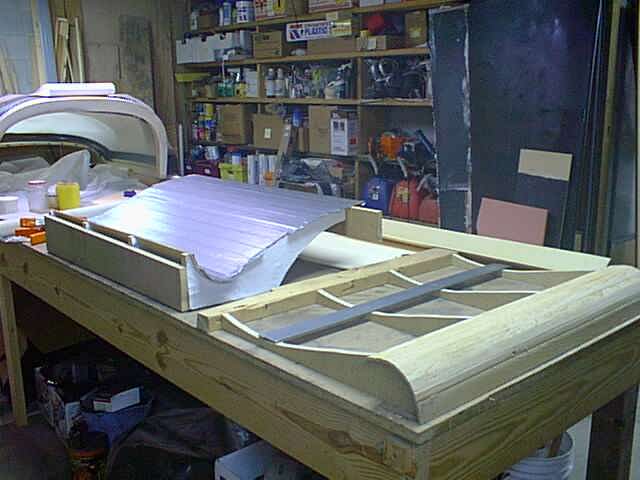
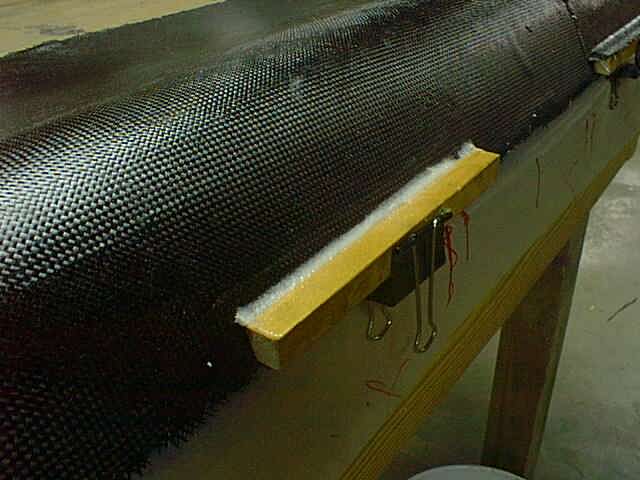
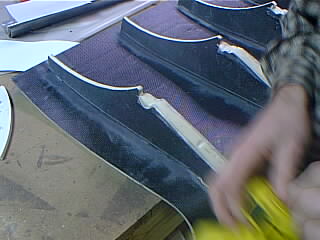
Here the curved part was nailed to one of the forms, and the carbon fiber is cut to fit, and laid out on the other form.
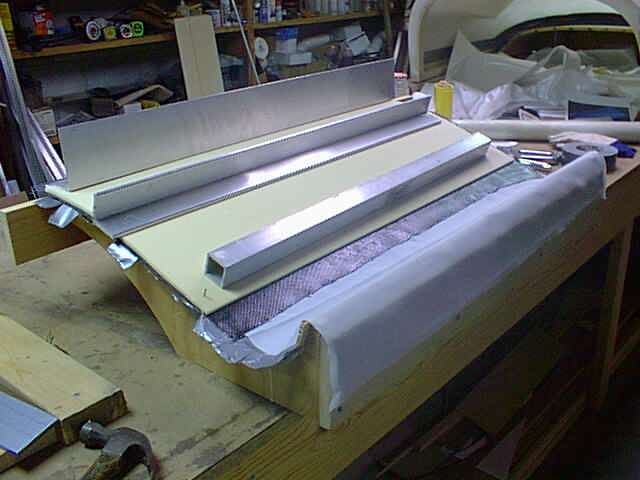
I laid up one layer of CF on one side of the 1/4" Lastofoam and nailed it face down onto some peelply, on top of the duct taped form. A few aluminum extrusions were used to weight the whole thing down.
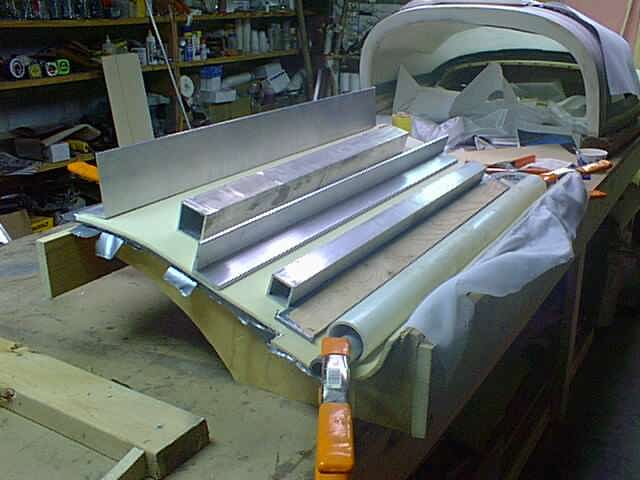
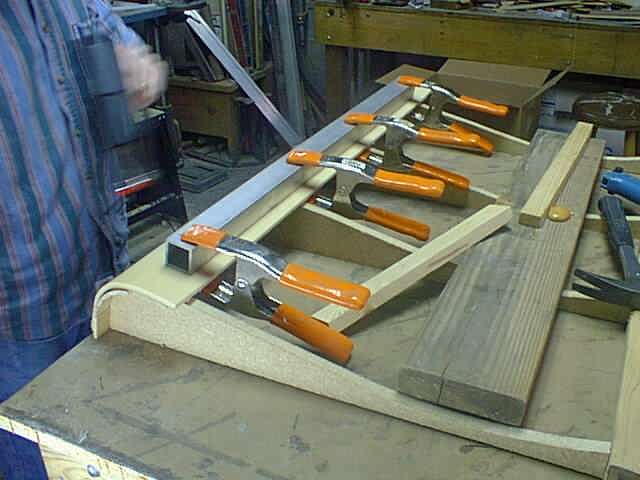
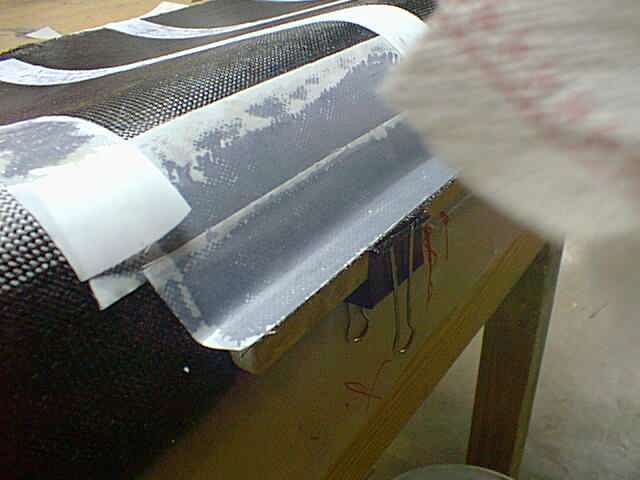
Then the curved piece was added, and a PVC pipe was clamped in place to tighten the curve up to the form. The joint was smoothed with a piece of plywood nailed across the joint.
The result was, well, amazing!

I added one layer of CF all over, with reinforcing where I expect passengers to stand when entering. The bottom received two layers at the highest stress points, the front and rear where the seat hangs from the spars. The TOP of the seat is done!
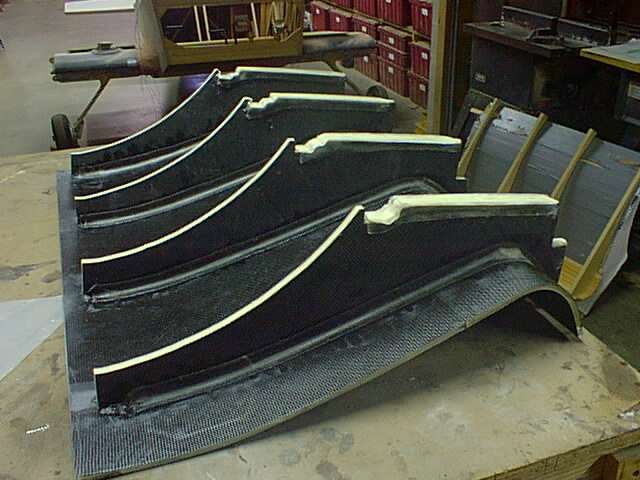
Next I cut out the reinforcing support ribs from another a piece of "plyfoam", which I made from 1/4" Lastofoam sandwiched between a two layers of carbon fiber, and using the same templates that I used to make the jig from, and temporarily mounted them between the spars.
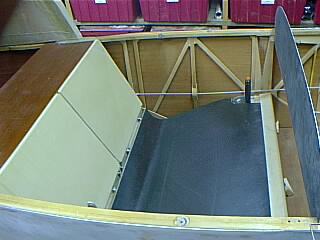
I needed some support brackets to hang the seat from, so I whipped these up out of aircraft grade mahogony plywood (part of the shipping crate that some Spruce came in).
A little trimming and the seat looks great, but still lacks support underneath.
Once trimmed to size, I put a layer of CF on the bottom side, and floxed in these Spruce blocks for the seat to sit on. The sit on similar blocks which are glued to the aft spar.
I then added two layers of CF to that immediate area to keep it weight from shearing the block off, and peel-plied it.
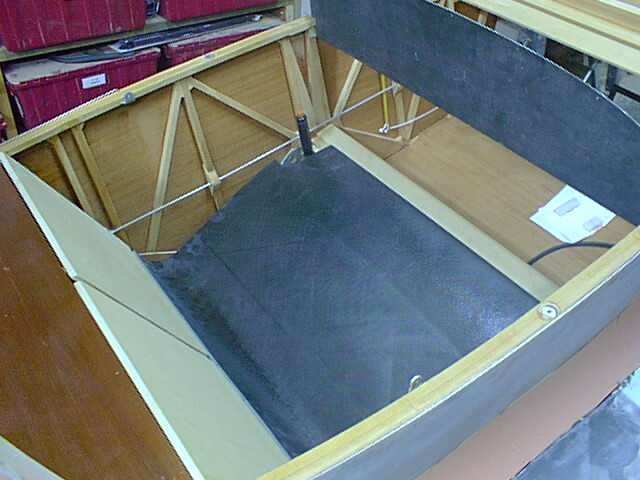
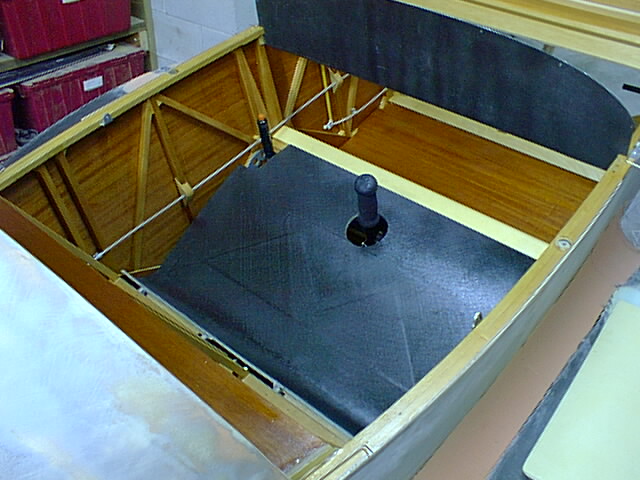
Here's the seat bottom installed. I made my seat backs the same way, but didn't feel the need to make them from carbon fiber, since the loads aren't nearly as high.
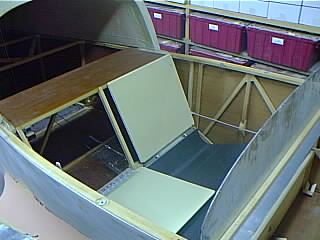
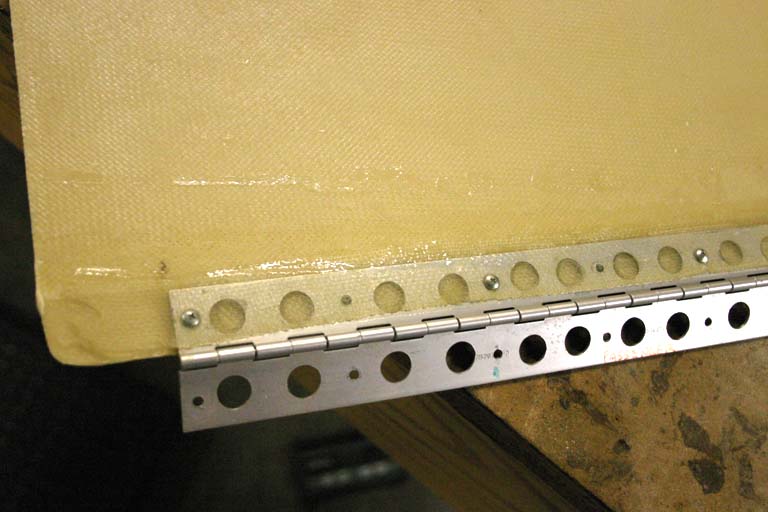
The seat backs hinge forward using some of that expensive extruded hinge material that I was supposed to use for the ailerons. I can use the passenger seat back for maps, or even a laptop, after I add a little edge around it to keep things from sliding off. Oscar Z suggested a cup holder, and I think I'll do that too!
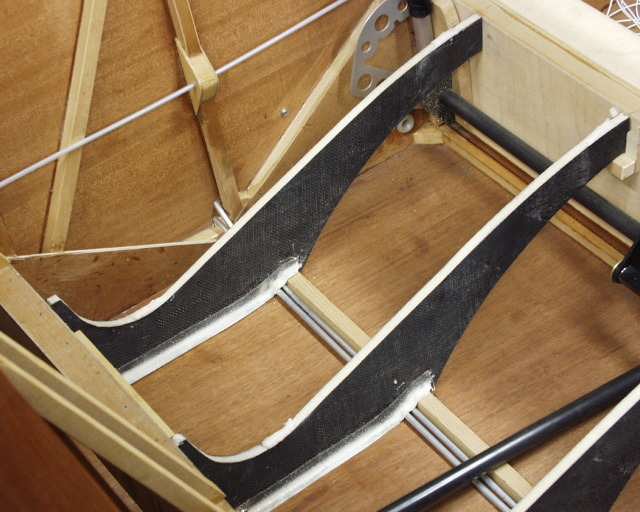
Here I duct taped the bottom of the fuselage and used flox and fiberglas tape to create "flanges" on the bottom of the supports, like the bottom of a beam. Note the temporary hangers on the main spar that position the supports.
I then put a dab of flox on the front and aft end of each support stringer, and weighted the seat down on top of them to let the flanges cure and to secure the stringers to the seat bottom.
Back to the workbench for a serious floxing and taping of the joints, and this seat is done! It lifts right out to expose the control stick and fuel pump, and requires no screws into the spars. The front is supported by the top of the main spar, and aft end by the support blocks, and the stringers stiffen it up considerably. It fits me perfectly, and I'm starting to wonder if I need padding at all! I'll get some of that "Space Shuttle" Temperfoam that's constructed of 3 different densities to make the seat cushions from.
Total weight is 4 pounds, 11 ounces (4 pounds 4 ounces after cutting out the holes for the dual sticks). After installing the seat and discovering how strong it is, I'll probably cut away most of these vertical flanges to leave them as a series of 2" deep ribs, rather than as connections to the weak floor area. Also, I'll probably delete the wooden blocks and mold more carbon fiber into a continuousn "hook" that will hook over the top of the rear spar, rather than the blocks that I have now. I got this idea from KR builder's who've come along and reproduced what I've done, but improved upon that aspect! While I'm doing that, I'll probably lower the rear of the seat 2" so that the seat almost rests on the fuselage bottom, so taller passengers will have more headroom.
The sling seat, mounting bolts, aluminum bar (that retains the front edge)and associated tube was a little over 4 pounds, so I now have a bulletproof seat that cost me four ounces over the original design.
Well, that's OK, I SAVED 3 POUNDS by replacing the plywood seatback with plyfoam! Plyfoam is 1/4" Lastofoam covered with two layers of glass front and back. Don't use carbon fiber for your seat back if you have a radio antenna behind the seat! Here you can see the hinges are attached with screws into the micro, and two layers of fiberglass tape over the top of it all. This works fine, because the loads are taken by spruce stringers, rather than the hinges.
The final result isn't too bad.