After spending about 2 years fretting over what to do about the wing root fillets, I finally decided to JUST DO IT! I sealed the cavity with cardboard and made a trailing edge pattern out of 3/32 plywood and glued it in place.
originally created Aug 25, 2000, updated Sep, 2002
After spending about 2 years fretting over what to do about the wing root fillets, I finally decided to JUST DO IT! I sealed the cavity with cardboard and made a trailing edge pattern out of 3/32 plywood and glued it in place.
Then I mixed up some two part urethane foam and poured it in.
15 minutes later and I was sanding it, using a 3" diameter cardboard tube with floor-sander paper wrapped around and glued to it. It took about an hour to sand to shape.
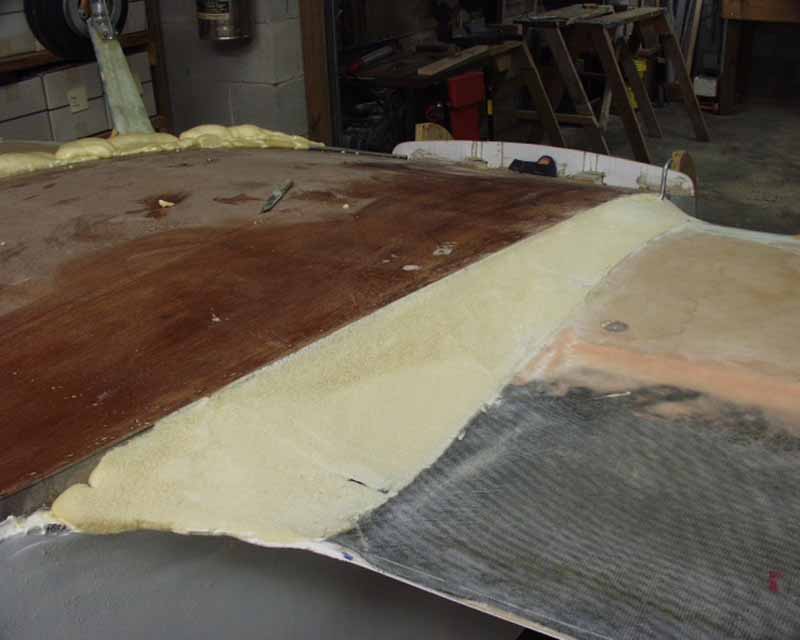
Three hours later this side was DONE! Except for the finishing, which very well might take forever. I used carbon fiber here because I had some left over, and to mininize damage if a tool was dropped onto the fillt.
If I had it to do over again, I'd have run my stub wings right to the fuselage, with the airfoil template about an inch away (5/8" sounds like a convenient number). This would have also provided me with an extra four gallons of fuel. Then when sanding the stub wing I'd have stuffed some foam down in the gap and sanded it too. Then the only fillet I'd have constructed would be of micro using the radiused end of a paint stick. That's all the fillet Nemesis has, and it seems to fly fast enough!
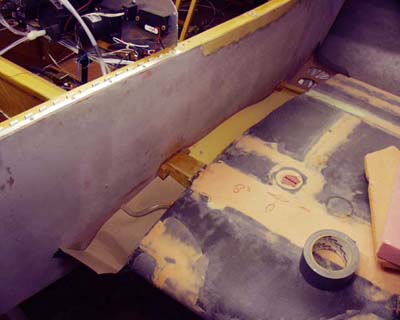
Update, September 2002 - Lower fillets
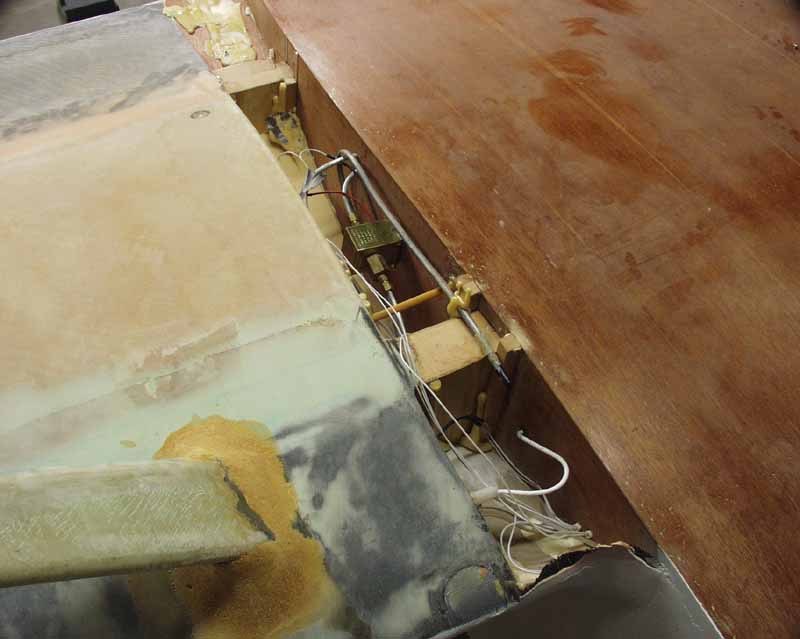
This is what my pilot's side wing root looks like, with fuel vent line and fuel transfer pump built into the stub wing. If I ever need to replace the pump, I'll cut an access panel then!
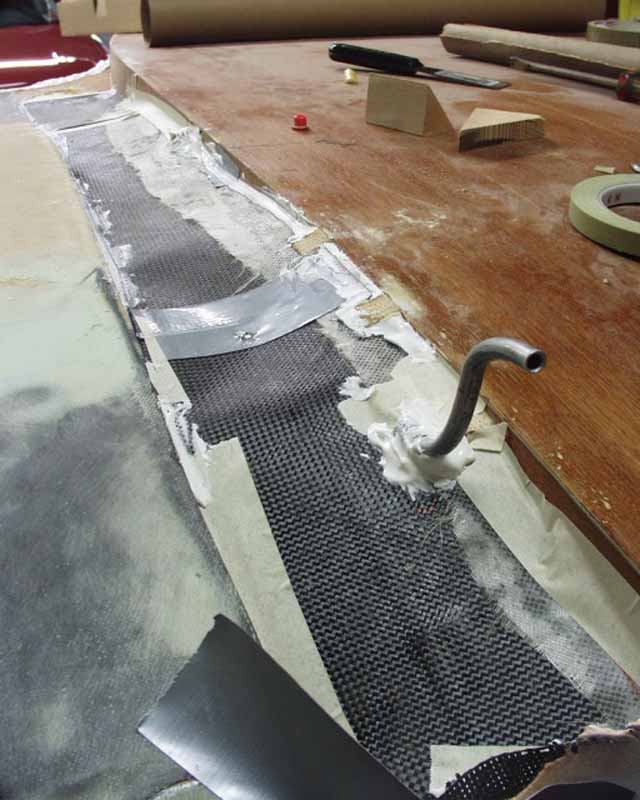
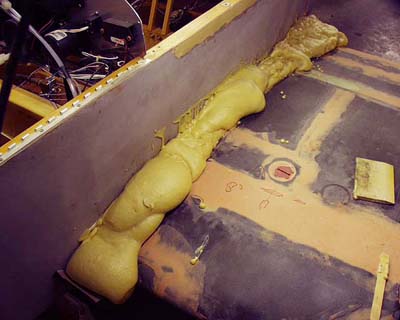
I used cutoff scraps of carbon fiber that were already epoxied and cured in place of the cardboard that I used on the top, and taped the joints to prevent the 2 part urethane foam from running down in the cracks and "blowing something up". I also added on to my fuel vent pipe...

...and poured in the foam.
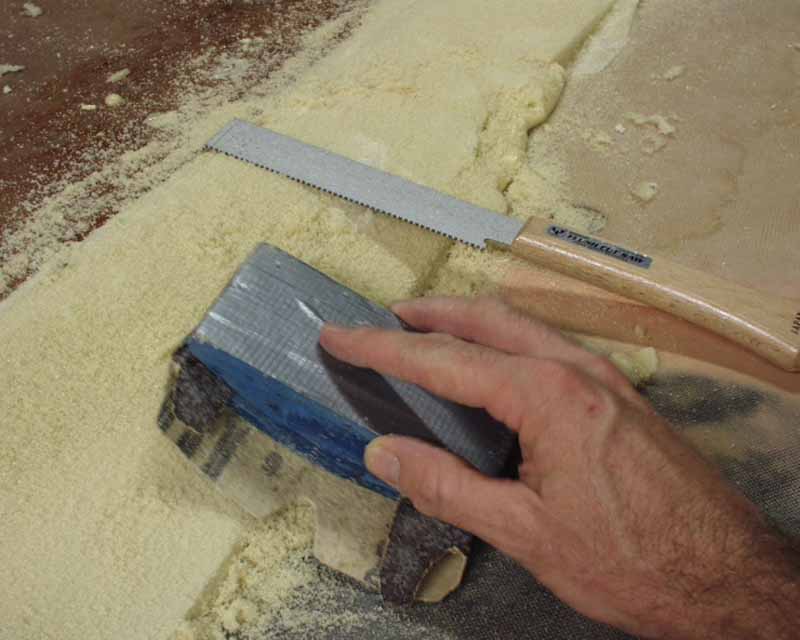
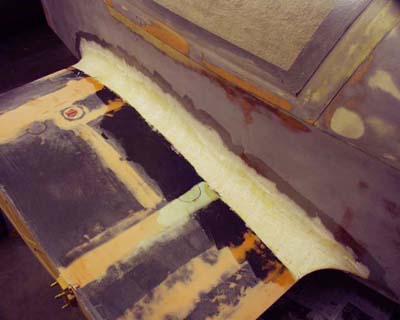
I used the curved side of a 3M sanding block to put a radius on the fillet. This was something like 18 grit floor sanding paper, taped to the sanding block on the back side.
Two hours later it was sanded and looking pretty decent.
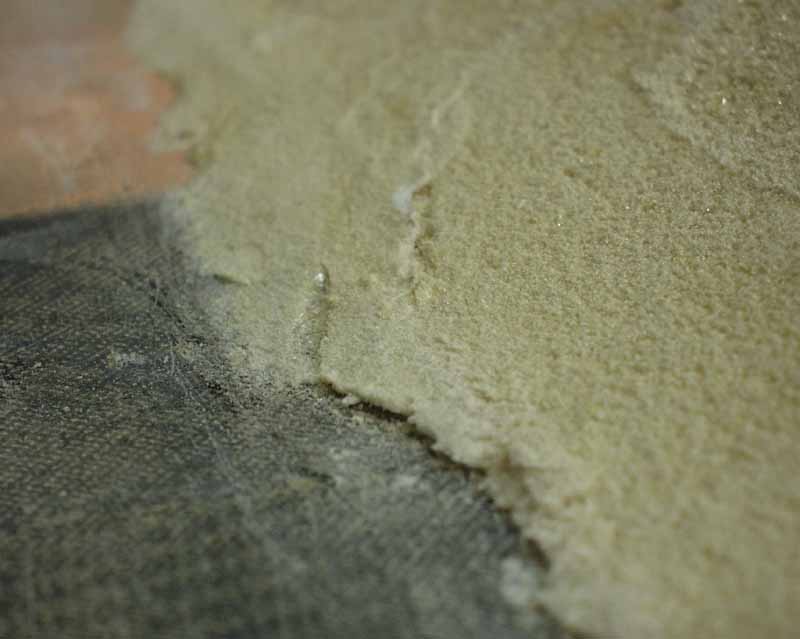
The biggest problem with using polyurethane foam is that it often cures in "layers" of different densities, which makes sanding difficult, and a smooth surface almost impossible on a curved surface like this. The best thing to do here is put a layer of fiberglass on it and smooth with a filler like micro.
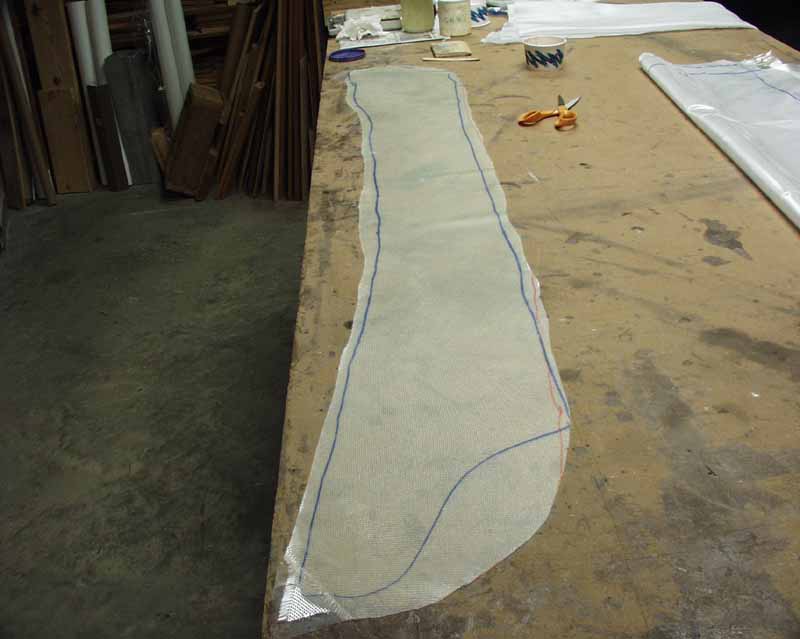
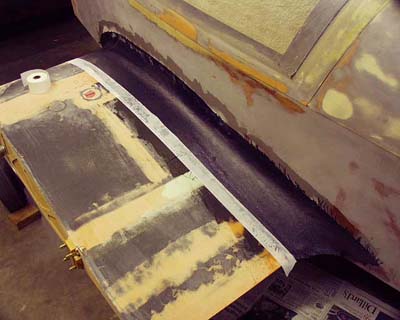
I used my usual method of laying plastic over the fillet and outlining the shape of the fiberglass layup required, then wet out the glass on the plastic, and cut to shape.
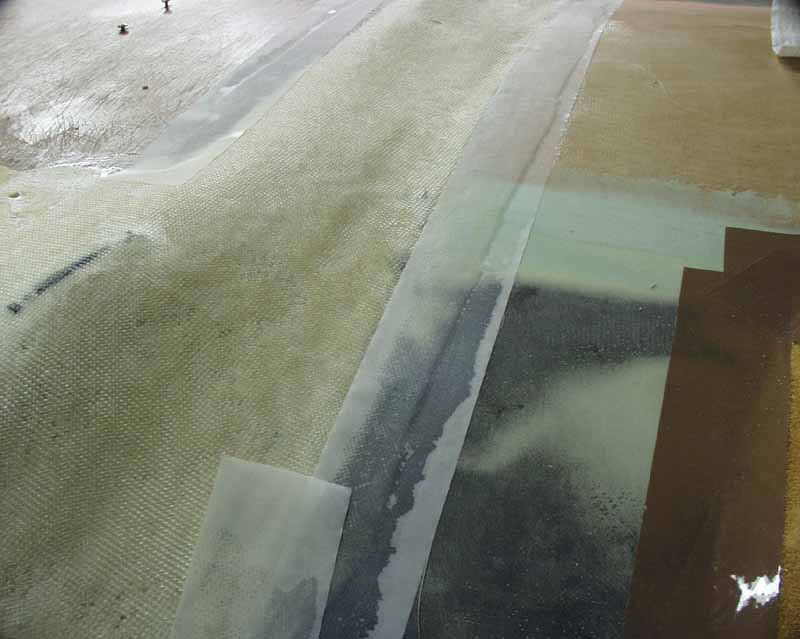
I used peelply strips along the joints to smooth the ragged edges that would have ocurred without it. You can see the lack of smoothness created from the varying density of the urethane in this photo.
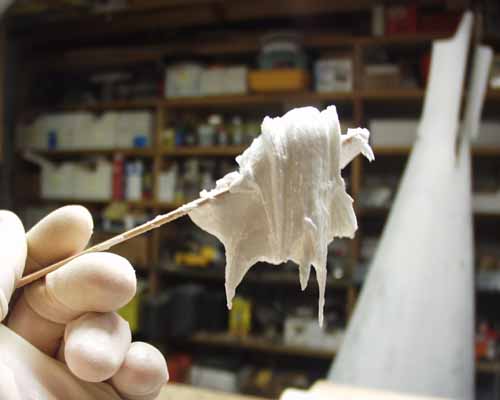
This is what "filler" micro should look like prior to spreading...thick enough so that it will hold its shape for something like 30 seconds.
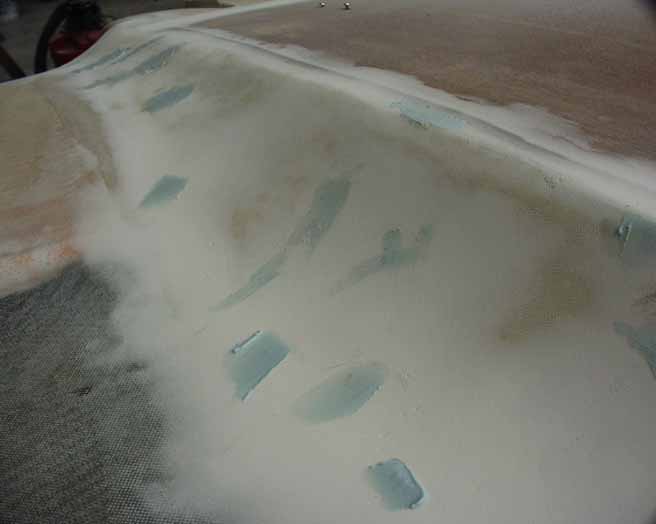
After sanding the micro filler to shape, I used SuperFil (the blue stuff) to fill little imperfections, mainly because I could see better how to sand all off the blue away except what was in the depression, preventing high spots. Were this not as smooth and creamy as SuperFil is, I'd have gone to a lot more trouble not to leave the ridges that you see here, by doing a better job wiping the stuff on with the squeegee.
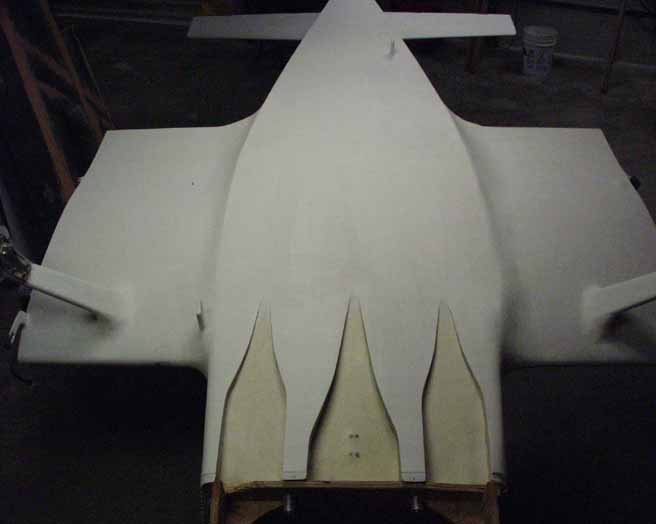
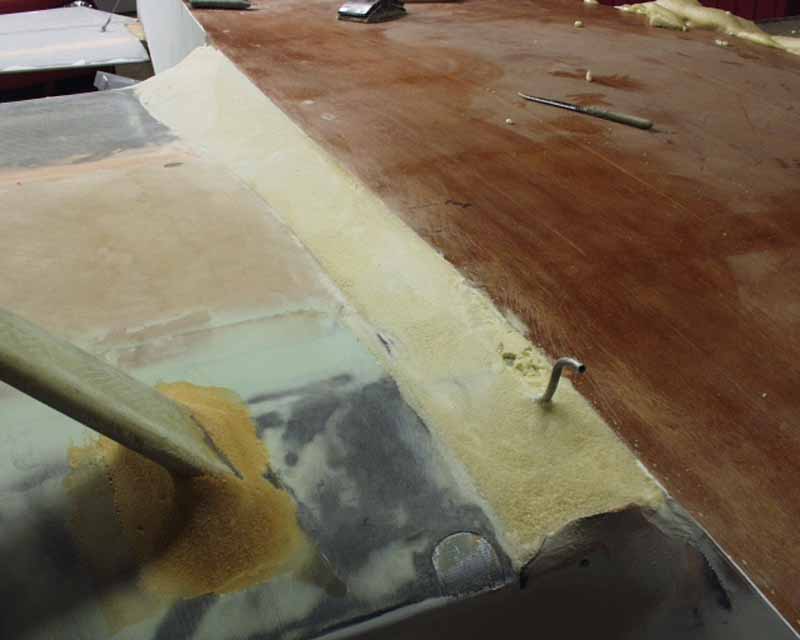
The final result wasn't perfect, but it's good enough for the lower fillets, and "good enough for KR"! The slight bulge on the right side near the leading edge of the wing is covering some fuel lines (supply and return, in case I ever decide to go with fuel injection), where they exit the stub wing and head towards the firewall, located on the OUTSIDE of the plane, rather than inside.
Return to Mark Langford's KR2S project