Corvair Prop Hub
Corvair Prop Hub
revised Jan 20, 2003 (fixed links to OneSkyDog's snapring photos)
I wanted more streamlining on my Corvair engine installations. After looking at the limited prop hub options for the Corvair engine, I decided I could do better, and designed a prop hub that's longer than the typical Corvair hub and saved some weight in the process! Rather than trying to accomodate the "unique" 11/32" GM threads in the crank flange, I rethreaded the holes and used high strength 10mm socket headed cap screws.
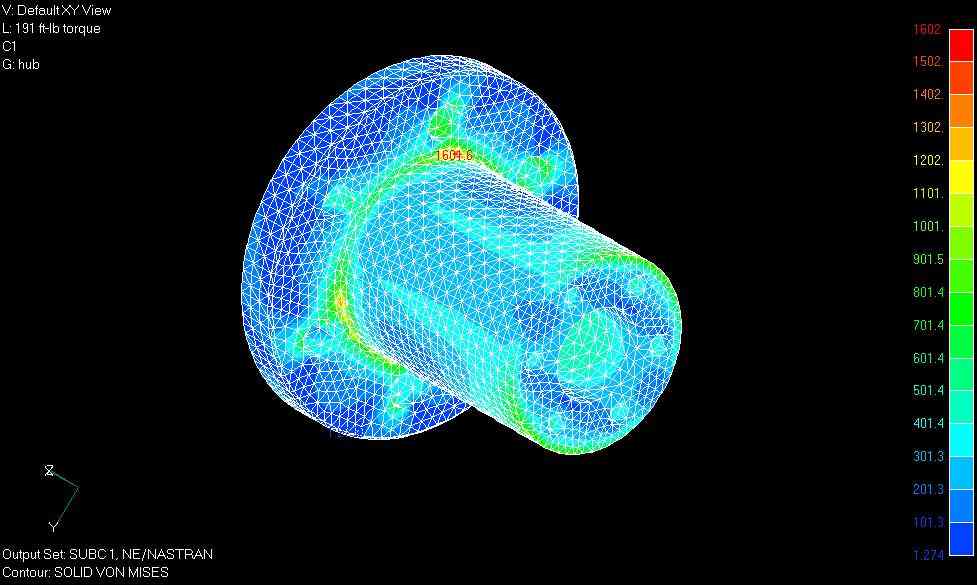
It is 5 inches long from crank flange to prop flange. I "solid modeled" it using Solid Edge and a parasolid was exported to FEMap and NE/Nastran by aerospace engineer Brooks Mitchell of APSTRAN (Applied Structural Analysis) in Huntsville, AL. The stress plot above demonstrates the extremely low level of stress that can be expected with my engine's anticipated torque of 191 lb-ft. This hub was "twisted" by 191 foot pounds of torque on one end, while the other was fixed, certainly a "worst-case" scenario.
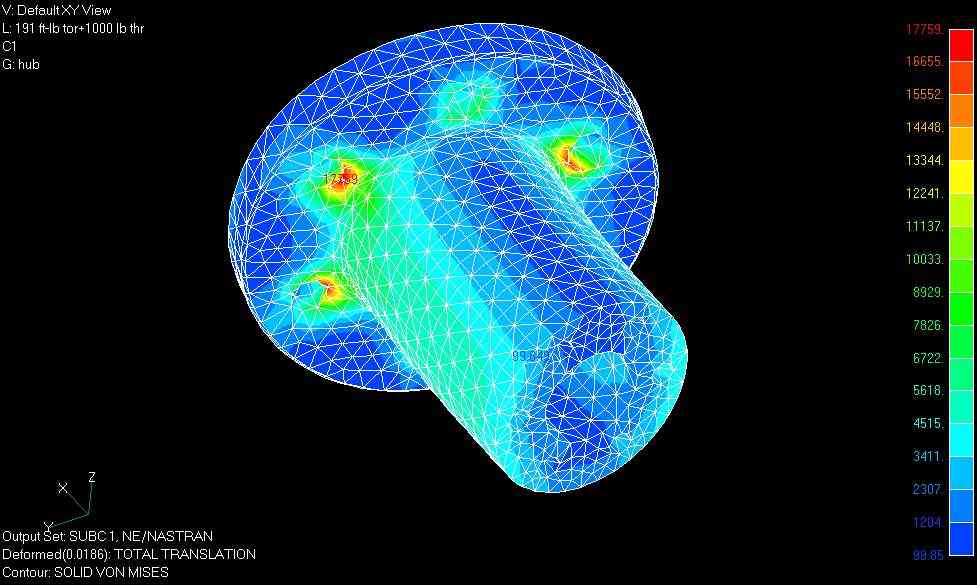
This stress plot shows some extremely conservative assumptions at work. Not only the 191 lb-ft of torque (from a 3100cc engine), but 1000 pounds of thrust (yeah, right!), and the entire 1000 pound weight of the plane hanging from one prop blade (that would be some serious shear on the hub), and approximates gyroscopic prescession. Still, in even this severe case, the fatigue life of the hub would be in the neighborhood of half a million hours! Obviously the deflection shown here is exagerated considerably.
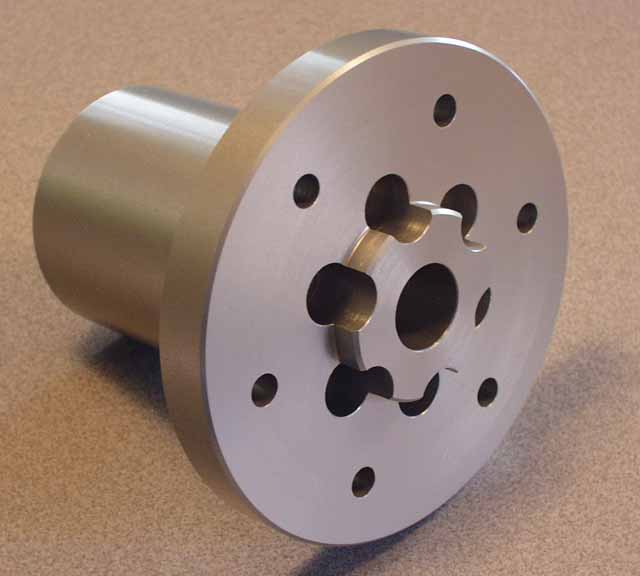
Not too bad huh? This is the prototype, with enlarged holes for drive lugs. The more research I did on drive lugs, the less I think I needed them.
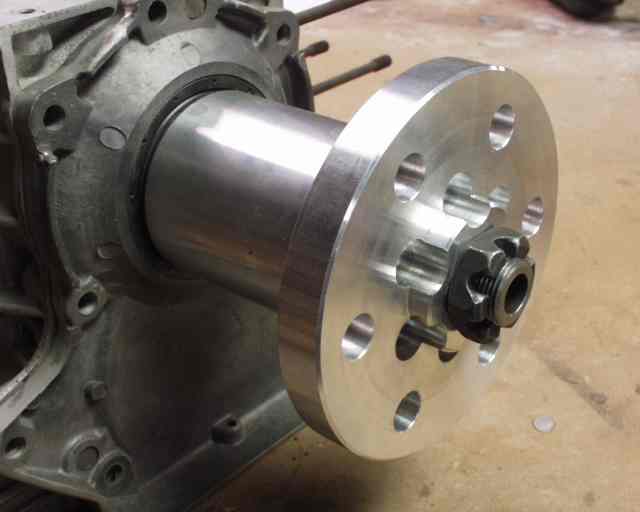
Here's the final version, with 3/8" prop bolt holes. It was hard anodized to minimize corrosion, and powder I painted the safety shaft for the same reason. I've posted the drawing from which this hub mas made if you'd like to see it at http://www.n56ml.com/corvair/prophub.pdf. This hub can be used with either a safety shaft or the "new" snapring method described below. Unless you badly need a longer prop hub, I'd recommend buying William Wynne's hub. It's a bargain, I assure you.
LATER...
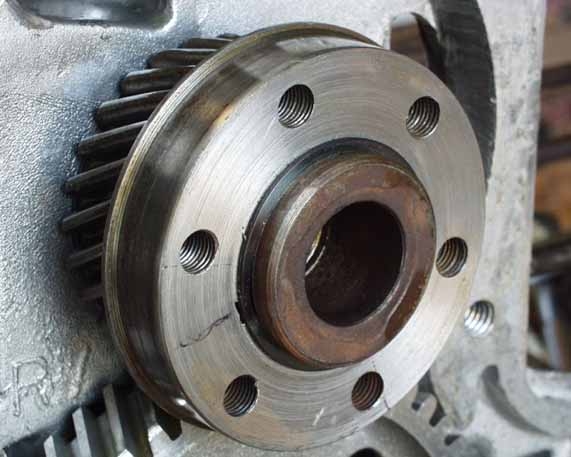
In my opinion, the safety shaft has recently been outdated by OneSkyDog's snapring method, which involves some minor machinework on the area of the crank that extends PAST the crank flange for a snapring. It's the thin shiny black thing on the nose of the crank that's ensuring that the gear/flange is held on. The safety shaft method involved drilling and threading a 1" diameter hole into the end of the crank, which had the potential of creating internal stress risers. This snapring holds the flywheel flange to the crank. The one thing that the safety shaft did for you was to provide an extra bolt to hold the prop itself on, but if you've lost enough prop bolts for the safety shaft to come into play, you've got bigger problems!
There are drawings, specifications, and everything you need to know to do this to your cranksahft located at http://www.n56ml.com/corvair/lockring.zip. The lockring drawings were created by the CorvAircraft's list's "OneSkyDog", who brainstormed this method of positive retention of the flywheel flange to the crankshaft, without drilling big holes or using 1.5 pound safety shafts and nuts. I have personally flown almost 300 hours with the snapring on my hub, and can tell you it works.
You can order snap rings for a couple of bucks from McMaster Carr. Search for "spiral lock ring", and choose the appropriate diameter and thickness from the list.
Return to Mark Langford's KR2S project.