
written Aug 17, 2002, updated August 2007
I'm probably famous for wanting to make every little part of my KR2S, and have even gone to the trouble of buying a TIG welder and learning how to use it so I can make some of the steel and aluminum components in my airplane. But I'm really getting antsy to fly soon, and welding up a complete exhaust system would take me forever so...
...I talked Terry Bailey into buiding one for me. This system is his design, and is totally stainless steel throughout. Tubing is .065 wall, so it'll be here long after I'm gone.
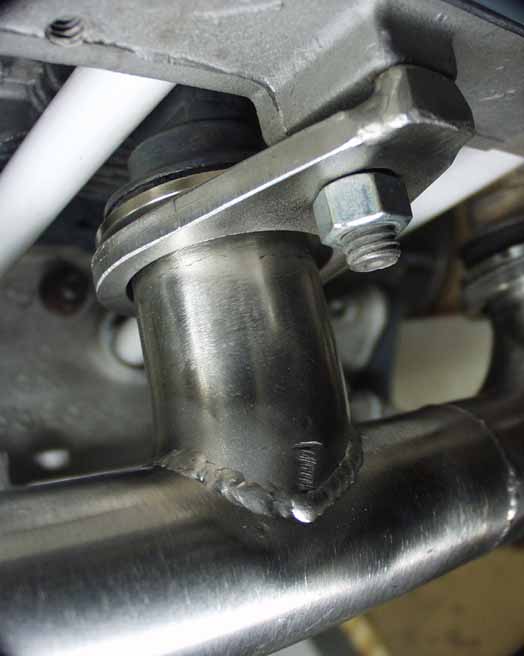
The flange mechanism is Terry's design too, and used some sort of spigots that he machines to match the angle of the exhaust flange donuts. After looking at it, I may cut off the outer half of the circle and save a little weight, which will leave them looking something like a distributor hold down clamp. The complete exhaust system (all the way down below and a foot past the bottom of the cowling) weighs right at 9 pounds, which isn't too bad when you consider that GPASC's 4 cylinder exhaust system weights 7.8 pounds, and I've got two more cylinders.
The welding on these headers is unbelievable, and he went to the trouble to do it right by purging the insides with argon for perfect weld penetration and no oxidation on the other side. Although I probably could have built a set of these, it would have taken me at least four months, and I couldn't have gotten anywhere near the quality. These things bolted right up, look immaculate, and best of all, I was working on my plane while he was building them! This was a lot of work for him, and I really appreciate the effort. He might be talked into making another set or two for other VairHeads, if you throw about $500 bucks at him. The flange allows the downpipe to take on whatever shape is needed to fit different airplanes. He's at baileyt@alltel.net.
Before flying, I installed an air/fuel mixture gauge. This page shows the oxygen sensor "bung" and gives part numbers and source for gauge and sensor. Now that I've been flying, I can tell you this thing is invaluable! Several times I'd have gone down had I not known exactly which way to move the mixture knob to straighten out the engine...

At 440 hours, the exhaust system cracked at one of the welds. I rewelded it, and now we'll keep a closer eye on it!

Here are some inserts that I installed in 2007, which reduced noise levels considerably, by about 4 db.
Update, July 2007

I now have 470 hours on the system described above. It had problems, mostly that the connection to the exhaust stubs was less than reliable. As you can see, the clamps were poorly designed and would bend rather than clamp, and often cocked the exhaust to one side or the other, compromising the seal.

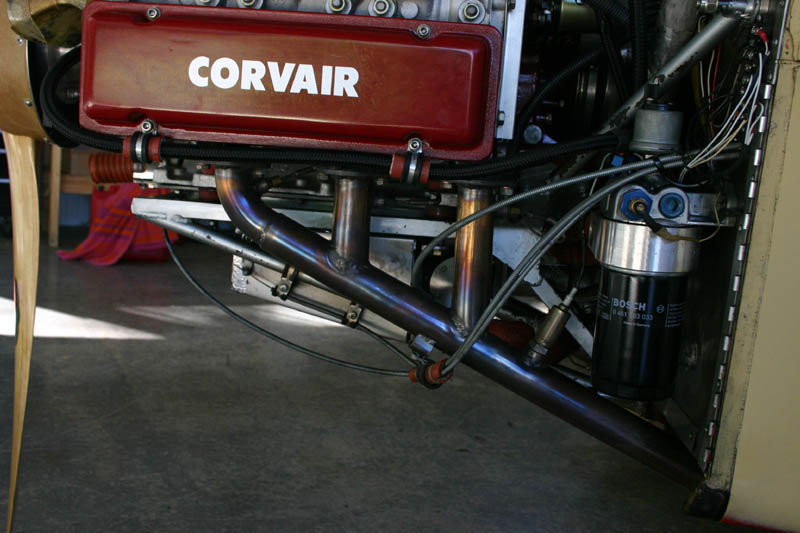
Another problem is the fairly useless flanged connection from header to "tailpipe". Terry Bailey did this to allow him to make one set of headers to fit many applications (such as the Dragonfly) by merely switching tailpipes. To me though it's been a problem keeping gaskets in there, as the picture above shows, as well as dead weight. This is what it looked like when I landed at William's house, and the safety wired firesleeve is a stop gap measure to get me back home without melting my oil line. This picture is a pretty good argument for firesleeving everything near an exhaust system. A stainless shield was also added between the flange and the oil cooler, because I didn't have a spare gasket with me.
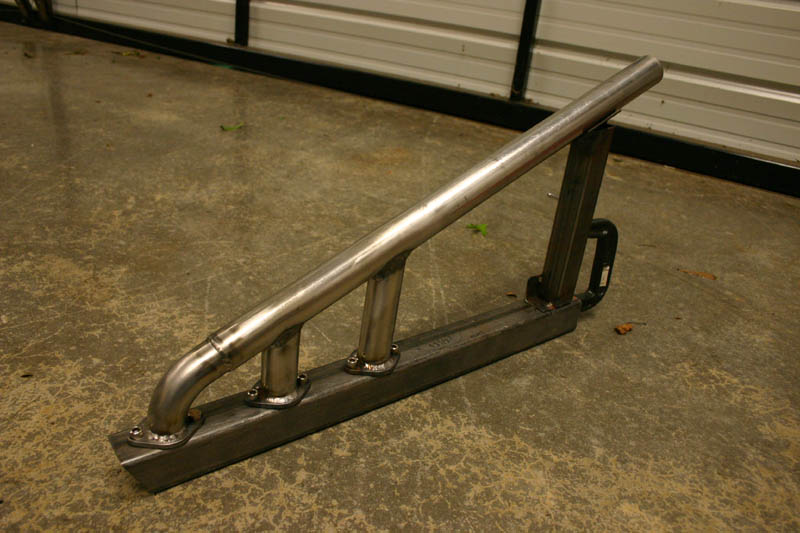
 Another disadvantage with my old exhaust system (shown above before it was ever flown) is that it extends so far back that it comes very close to firewall, preventing me from mounting a larger oil cooler or other stuff that would be nice to have room for. Any new design would need to head downwards from the front cylinder at about a 22 degree angle so it conveniently exits right at the bottom of the firewall.

William's been making his 601 exhaust systems from these stub pipes which he has CNC'd. They are a sweet fit to the stock Corvair stub pipes, and make a very tight seal. I bolted three of these up to my engine and went to work cutting tubes to fit up to them. William then used his exhaust system jig (which locates the three stubs exactly with relation to each other) to weld all the pieces together into an exhaust system that fits perfectly.

This exhaust system weighs half of my previous one (4.5 pounds total for both sides), without the extra flanged connection (or possibility of leaking), and opening up some space on the firewall for other things. The two large threaded bosses are from Summit Racing for my O2 sensors, and the six smaller ones I made myself for the EGT sensors.
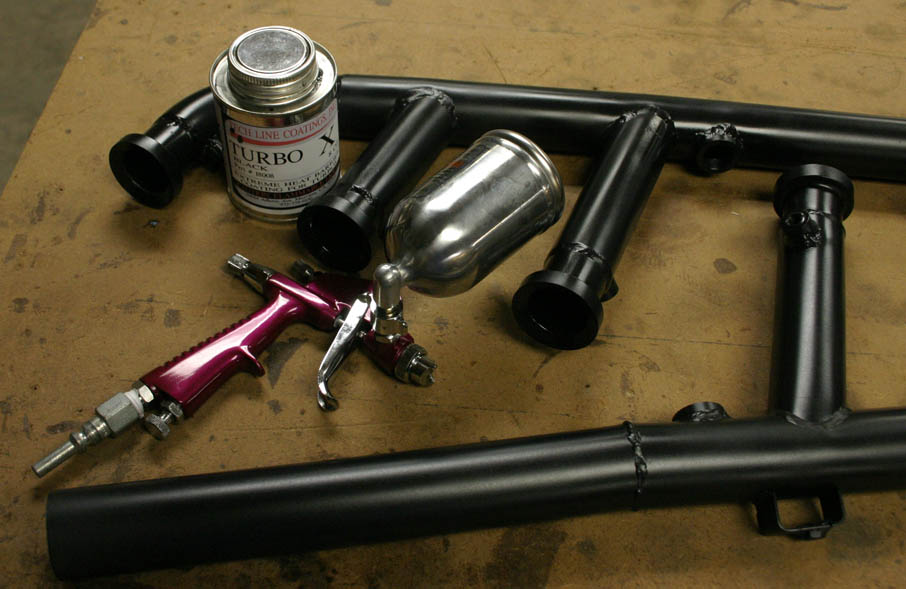 After welding on the sensor bosses, I decided I'd ceramic coat the headers for longevity and to lower heat transfer through the headers into the area under the cowling. This is supposed to increase engine power slightly also, by rejecting the heat faster. The coating is Turbo-X from Techline Coatings, part number 18008, and I only used about a quarter of the 8 ounce can do both outside and inside (as best I could). I bought the "mini detail spray gun" on sale at Harbor Freight (part number 92126), and it's a really nice little touch-up gun. I did have to sift through three of them to find one that had adjustments that actually had full travel though. It has a nice little spray pattern and is very easy to cleanup after spraying, and it doesn't take much air pressure to run it.
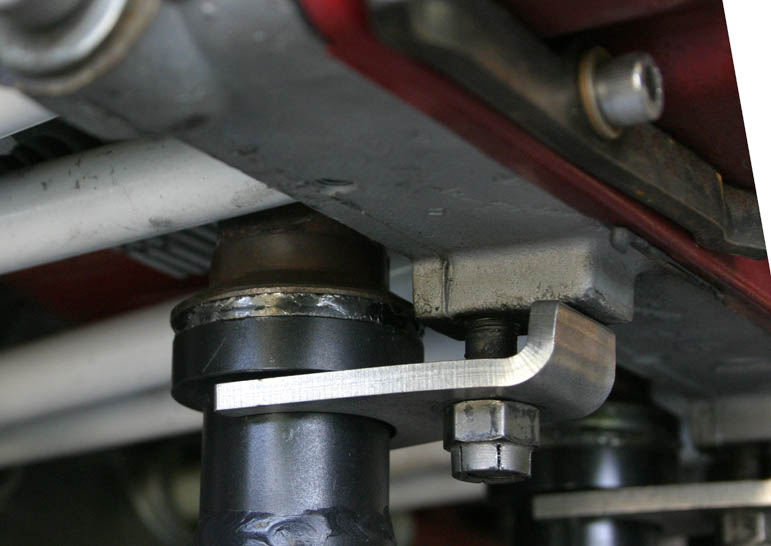
These flanges really are a perfect fit. I suspect this will be the end of exhaust leaks for N56ML.
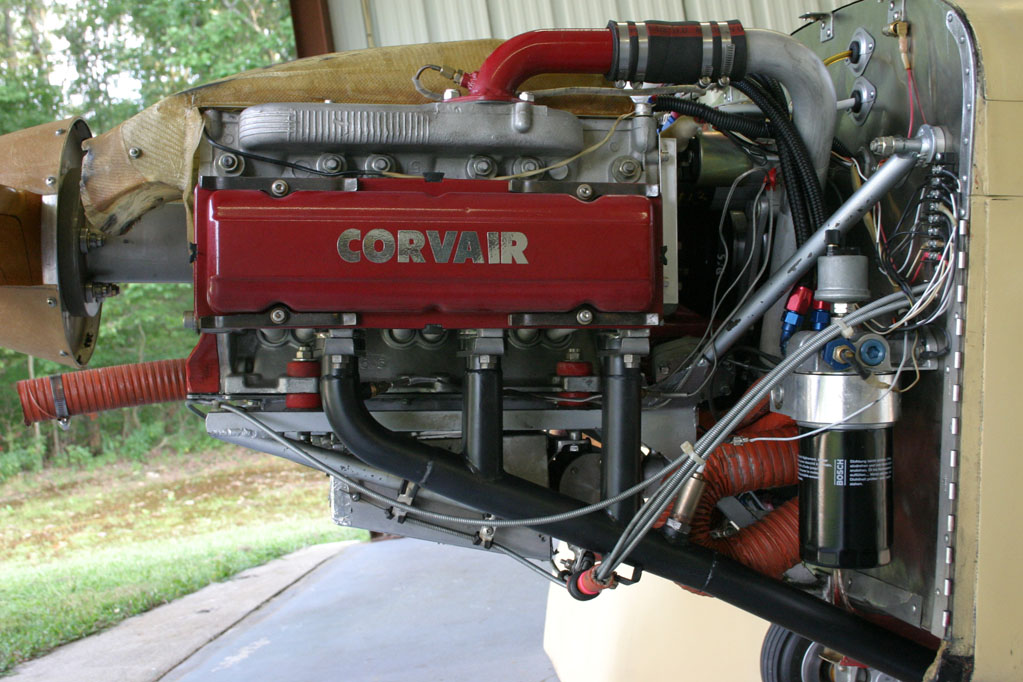 Here's the final result, although there was still some tidying up to do with EGT probe wires and that sort of thing. I should have masked off the areas where the carb heat and cabin heat muffs go, but I wasn't entirely sure where they needed to be, and I wanted to see how much of a difference it would make anyway. The coating is easy enough to remove mechanicallly, by sand blasting or wirewheel. From a performance standpoint, it may put out slightly more power, but it is definitely smoother. That may be a function of having two oxygen sensors in it, so that each downtube has the same amount of restriction.
Exhaust system number three, on the Phoenix2 3100cc engine
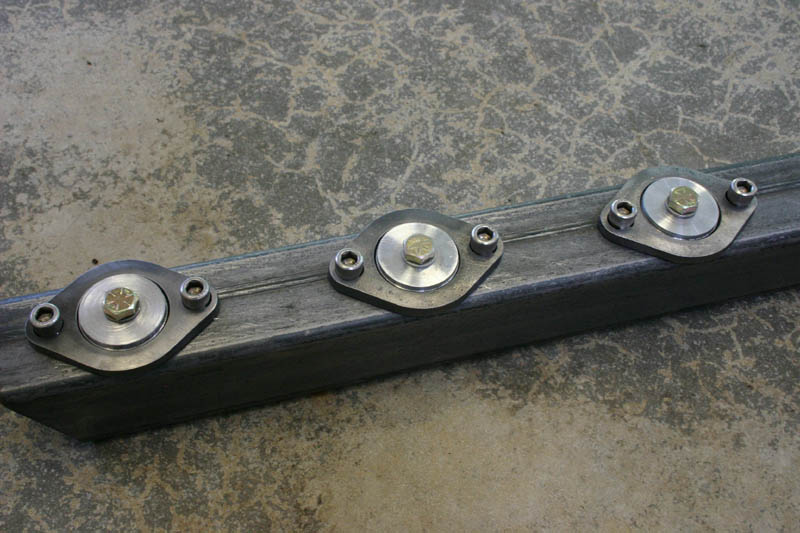
Since the heads for Bob Sutcliffe's heads have flanges on the exhaust stubs, I had to make a new set when I rebuilt the 3100cc engine. First let me say "don't even try tacking it up on the plane and then taking it to a welder". It'll come back like a pretzel! No, I haven't made that mistake, but I deal with enough welded fabrications at work to know that you'll never hold the 1/16" or so tolerance needed for the three stubs to align with each other at installation time. I made this fixture on the mill to put all of the flange holes in line and with perfect spacing, but you could get awfully close with a straightedge and a tape measure. The flanges you see here are about to become part of the exhaust system, and are carbon steel VW exhaust flanges for use on type 1 exhaust systems. I TIG welded them to 321 stainless pipes, which requires 309 stainless rod (for welding mild carbon steel to 321). I had to explain to the local welding supply place that there was such a thing, and that I really did need it. They'd have to order it by the pound, which was over a hundred bucks, so I borrowed three rods from work and went about my business instead. The aluminum disks are there to locate the pipes (I didn't know I needed them until I tried to center the pipes). They are a very tight fit to the pipe ID (1.37") and they are made from aluminum to keep me from accidently welding the pipe to the disk.
Here's one side almost done. It only lacks EGT bosses and oxygen sensor boss. The larger tube is 1.625" OD, smaller tubes are 1.5" OD, .060" thick. 321 is the stainless of choice for high temperature applications like exhaust systems, but it's really expensive. I have about $400 in stainless pipe alone for this exhaust.

Here's the fit-up for the second one. I did a much better job of matching the joints where the 2nd and 3rd tubes mate with the downpipe. Notice that the far right end is clamped to a cradle to ensure that the downpipe is forced to stay there. If I'd not done this, all of the welding on the tubes would have tightend up the bottom of the tube (in this view) and the downpipe would have ended up about an inch closer to my firewall, which would be touching it. I know this because that's what happened to my last one. This one's exactly an inch from the bottom of the firewall on both sides. Note that I had to move the pedestal to 2.45" closer to the flanges so accomodate the shift in cylinder between the pilot's side and passenger side.
The angle on the passenger side is 23.5 degrees, at least for my KR. Center to center spacing on the tubes is 4.85 inches, FYI. That's straight from the GM head casting drawings. I also jigged the exhaust pipes back in the fixture when welding in the EGT bosses (which I made on the lathe) and the O2 sensor boss. These bosses can be bought from Jegs racing among others such as Burns Stainless. I use 8mm EGT bosses, and 18mm O2 sensor bosses (same as aircraft sparkplug threads) that fit the generic VDO 11027 sensor. See the air fuel mixture gauge page for details.
Here's the exhaust with about 8 hours on it. The throttle, mixture, carb heat, and ram air cables are routed through a cushioned P-clamp which is screwed to a bracket that I welded onto the bottom of the pipe. It's just a little U-shaped piece of 304 that bend up in the vice and welded on. 347 rod is what you use to weld 321 to 321 or 304. I'd have painted it with Turbo-X ceramic paint before flying it, but I just didn't have time. I'll do that one of these days. You believe me, right?
Let me say that during and after making this exhaust system, it was a real pain in the butt. Looking back, I wish I'd made it out of carbon steel, painted it with Turbo-X or had it Jet Hot coated, but I didn'th have time to coat it, if I wanted to fly the plane to the Gathering. What I'm saying is that building an exhaust system is not a trivial exercise, even if you own a welder and a mill.
Return to Mark Langford's KR2S Corvair engine project.