Mark Langford's KR2S Project
Mark Langford's KR2S Corvair Airbox
created March 6, 2005
I needed an airbox to fit my Ellison carburetor and would incorporate a K&N filter, a heat muff connection, and a ram air connection. I'll bet I drew a hundred different sketches of how to make all that stuff fit into the little 5"x10"x10" area that I had, and I finally did it. The great leap was made when I decided to filter the ram air, rather than bypass the filter. It's practically no restriction anyway, and now I can leave ram air on all the time, except when I need carb heat.
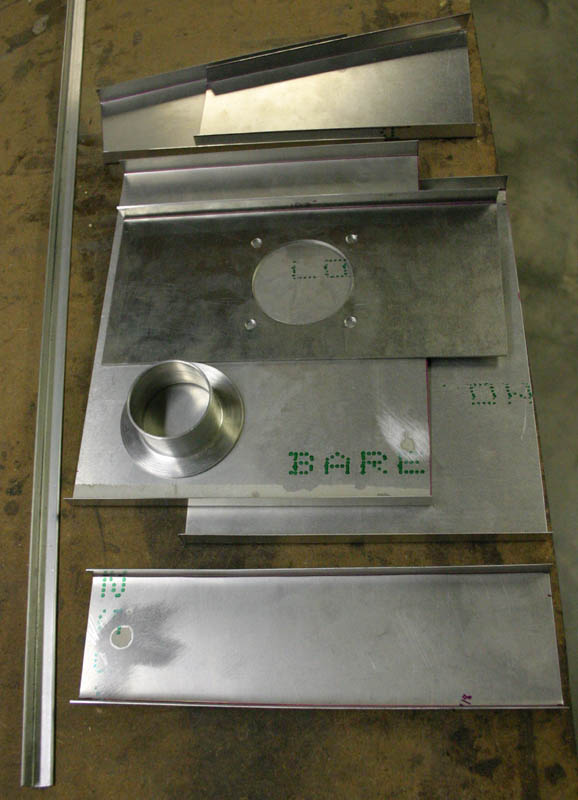
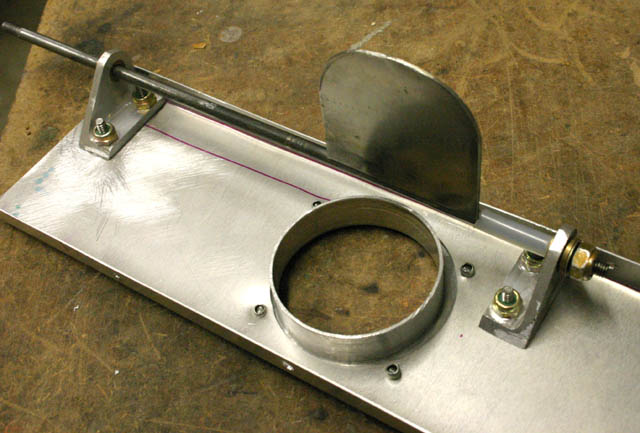
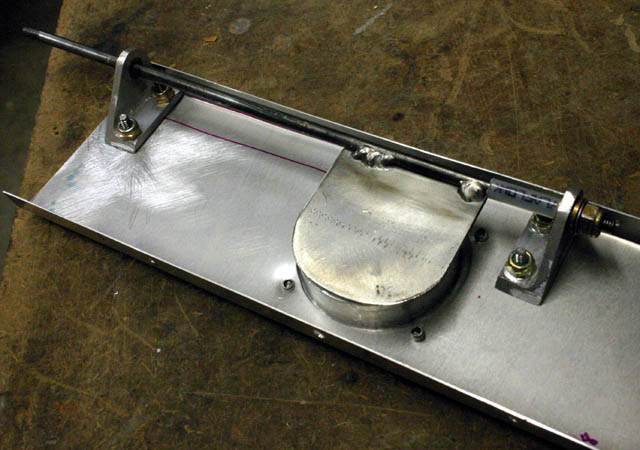
Here are the main pieces of the box, including two left sides (I didn't know it yet though). I bent them up on a small sheet metal brake. I used all kinds of leftover rivets putting this thing together, so don't critique my workmanship on this thing. And I never said I was a sheet metal expert!
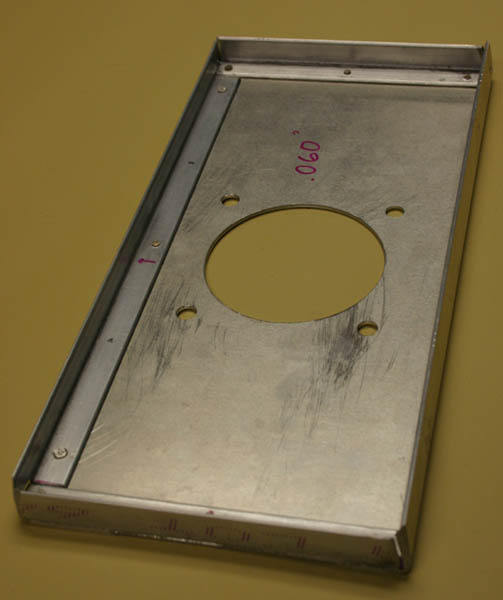
The carb mounting plate is .063", and the rest is .025" 6061-T6. The angle is 1/2"x1/2"x.063" from Wicks Aircraft. I could've used it at all the corners and not even needed a brake, but it would have been heavier that way. On the other hand,it would have fit together better. I cut the big hole with a hole cutter (in a drill press) from Home Depot, designed for wood work, I'm sure.
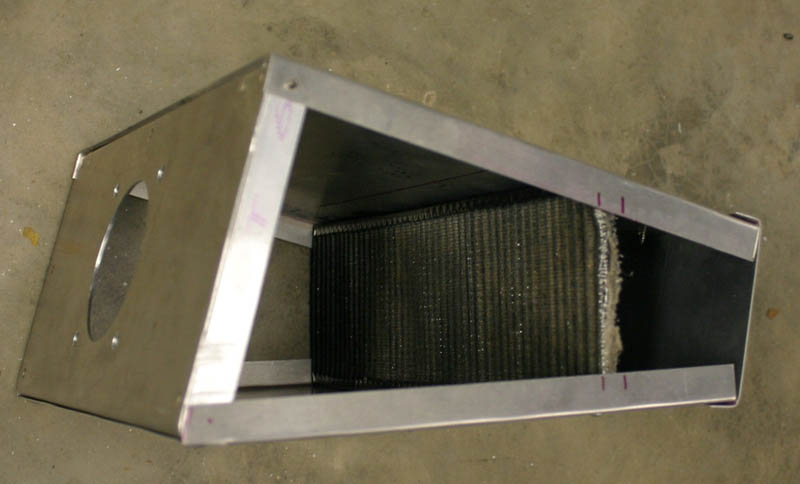
This K&N filter section is about 3.5" tall, and 10" wide, which gives me the amount of area that K&N says you need for a 3100cc engine running 3800 rpm max. This filter area is what dictated the size of the box, and this cross-section was the only way to make it fit where the box had to go. I cut it out of a rectangular one originally made for a Weber carb on my Karmann Ghia. I bought new ones a few years ago because an oil line had rubbed a hole in one of them, so it didn't hurt to cut one up. K&N sells all kinds of oddly shaped filters, but I just happened to have exactly what I needed on hand. (I guess that's why I don't ever throw anything away).
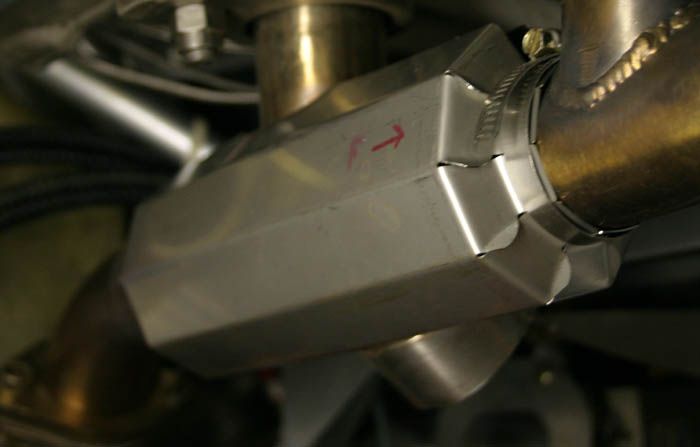
I'd originally tried to use an off-the-shelf heat muff from Wicks, but I thought I could do better. This one would've needed some holes drilled in it somewhere to let air in. I kept looking for some kind of door spring to wrap around the pipe to improve heat transfer, but always came up empty-handed. The only springs I found would require more strength than I have to wrap around the pipe, and then they'd still be so dense there would be no room for air to flow around them. I used this as my excuse for not finishing the heat muff for months.
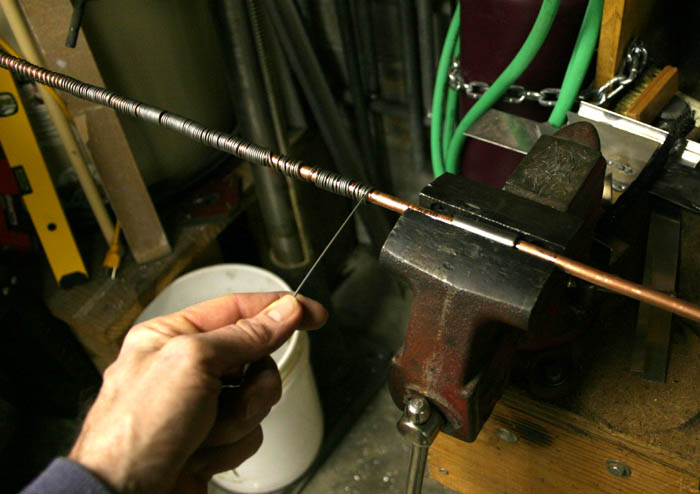
Then one night I walked into the basement and swore I wasn't leaving until I'd robbed a spring off of something and fastened it to the airplane. About two minutes later I spied a spool of .045" 304 stainless welding wire that the robotic welder uses at work. We weld up nuclear waste containers robotically, and when the spool gets almost empty, they swap it out to make sure it doesn't run out before a container is finished, so these things go right in the dumpster. I quickly stuck a piece of .5" OD 4130 tubing in the vice (as a bearing), stuck some .375" diameter tubing through it, clamped some Vise-Grips on the smaller tubing as a rotating handle, and wound the wire around it...
...and it worked like a charm! It amazes me how much time I spent looking for something that might work, compared to how quickly I made exactly what I needed!
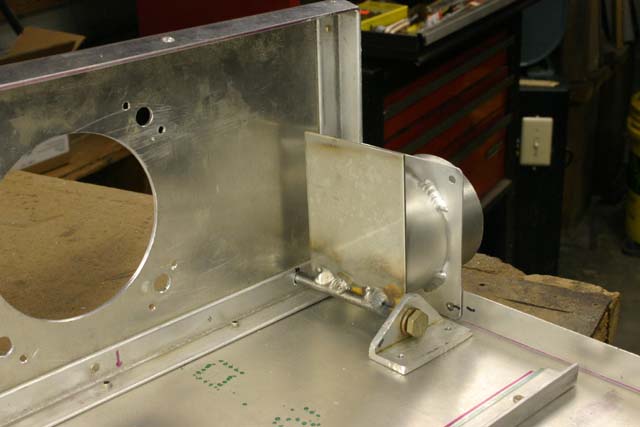
Next I cut out part of a Cheerios box to make a pattern. It's a lot easier to cut up paper to get the right shape and then transfer it, than to cut it out of aluminum or stainless to start with. I used .025" aluminum, which wrapped nicely once I'd rolled it around a 1.5" tube first. Since then I've come up with some .005" stainless steel sheet "shim stock" that McMaster Carr sells (9506K16). The tube you see stuck in there is a flapper valve bought from Aviacomp Worldwide. I was planning on using it to control carb heat, but I ended up with not enough space to mount it. So then I was going to use it for ram air, but I didn't have enough room there either. So now maybe I can use it for cabin heat. I just made a hole and welded a piece of 2" .035 wall tubing in there and called it done, but I'll probably remake it from stainless later.
Here's how the carb heat valve works (it's upside down in this picture). The tube with mounting plate is from Wicks, although I could have made it myself. The flapper is 304 stainless, welded to an AN3 bolt. Like all of my welding, it's not the prettiest, but it's not going to fall off either! The bolt is supported on oil-impregnated sintered bronze bushings, and operates very smoothly. It flops back and forth easily, but with no slop at all.

Here you can see what defined the shape and volume of the box. I needed some distance between filter and carb throat the give the air a chance to develope a natural flow before it got to the carb. Carb heat is unfiltered, mainly because there wasn't enough room to add the inlet in front of the filter, due to the engine mount. The dimensions of the box are 10" wide (although I'd make that an inch narrower next time), 5" tall at the base, 3" tall at the front, and 8" deep front to back. That's about all that will fit inside my cowling and between the engine mount, unless the carb is moved back toward the firewall some more. That would probably work too, but I put a 6" long tube on this manifold (before the T) to make sure the fuel was evenly distributed when it got there. 4" would probably work fine, and would allow more room for the carb heat hose, and maybe even room to integrate the two flaps into one unit, with filter closer to carb throat. That way the filter could also be taller and narrower, also facilitating the "one flap" mechanism. That's probably how I'll build the next one, and these are basically notes to myself when that time comes.
The heat valve worked so well I did the same thing up front for the ram air valve. Both of them fit very tightly when closed. Shaft is .188" 4130 that I threaded to 10-32 on each end, again supported in pre-oiled bushings. Spacer is scrap Nylaflow tubing.
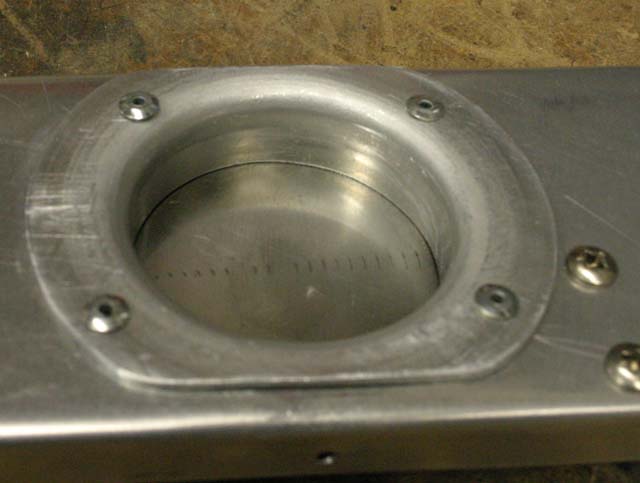
This flange is from Wicks also, with 2" OD. If my calculations are correct, 1.5" diameter will get me all the ram air I can use, but would be a little short for breathing inside the cowling with no pressure. You can see how well the flapper valve seals the opening. I had been concerned that I wouldn't be able to seal this very well, which would allow ram air to blow heat back out the heat muff door when carb heat was on, but there's no way that's going to happen with a seal like this!
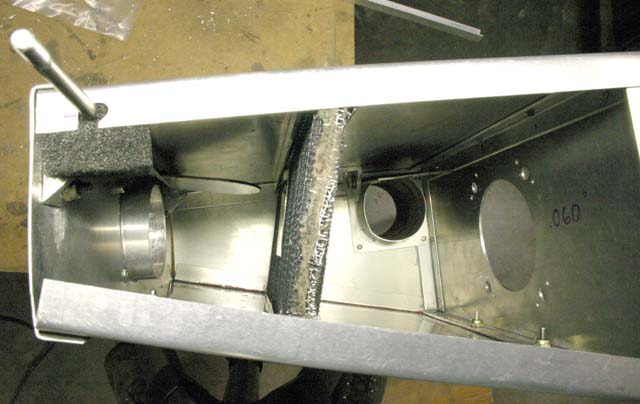
Here are all the players installed, with nothing but one side missing, and a lot of rivets that weren't installed yet. You can see a small square of aluminum located just inside the ram air inlet, fastened to the air filter. I read an RV'ers comments on the web that stated he fixed his rough running problems with the Ellison by installing a plate on the front of his air filter to keep the ram air from going directly into the carb. I'm going to try it too. Aviacomp also sells flow straightening vanes for the Ellison, but they are expensive, and with all the area I have out front of the carb, I don't think I need them.
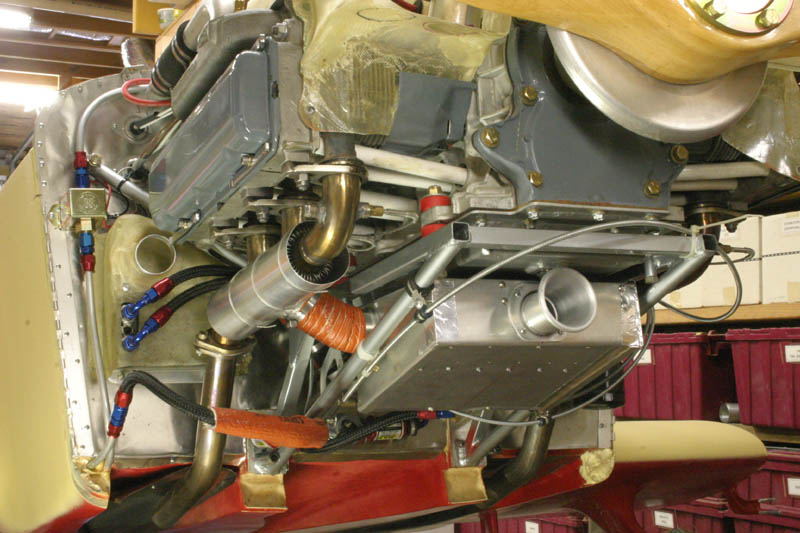
Here's the final installation. I have well over a hundred hours in the design and fabrication of this thing, not counting time spent looking in every hardware store in town (and McMasterCarr) for a door spring. The heat muff is held on with safety wire. The ram air is going to just suck from the cowling for first flights. Later I'll poke a hole in the cowling and stick a 2" tube in this hole, and see how much difference cold ram air makes. My guess is about 200 rpm. But for first flights, getting used to flying the plane, and testing, I don't want any surprises that I might get from ram air. The ram air inlet is a velocity stack from a 40 IDF Weber (previously used on the Ghia, before the 48 IDFs spiced things up).
I'm already figuring on redoing this air box, but I now know how do it better. Rather than a cable for ram air and a cable for carb heat, I'm going to reduce it down to a ram air cable. Why? The carb heat flapper operates very smoothly, so when the ram air is on, it will be blown shut. When ram air is off, it'll be sucked open by the engine's vacuum and heat muff air will enter. It doesn't get much easier than that! This will also eliminate the problem that I could have now, which is accidently closing BOTH valves at the same time, starving the engine for air, and resulting in an immediate shutdown. I thought about installing a magnetic trap door in the bottom that would act as an emergency self-actuated valve, but why not just use the carb heat door instead?
The next version will be about an inch narrower, to give me a little more room for the ram air lever. The other big change will be that the bottom will be removable, rather than the side. I had to get my 10 year daughter and her small hands to start the carb mount nuts, and then an air ratchet (with lowered air pressure) to tighten them, because there's not enough room to swing a ratchet or a wrench. Bad design work, I suppose, but easy enough to fix on the next one, now that I know where I'm going with it...
Return to Mark Langford's KR2S Corvair